What's this?
Accounts have been assigned only to users involved in the annotation process. If you believe you need an account, please contact Nicholas Heller at helle246@umn.edu.
What's this?
Accounts have been assigned only to users involved in the annotation process. If you believe you need an account, please contact Nicholas Heller at helle246@umn.edu.
The following are the instructions that have been provided to the crowd-workers for delineating each region based on the "guidance pins" placed by trainees and checked by radiologists.
The following shortcuts are recognized by the annotation tool.
| ctrl+z | Undo |
| ctrl+shift+z | Redo |
| scrollwheel | Change frame |
| ctrl+scrollwheel | Zoom |
| scrollclick+drag | Pan |
The task is to enclose all voxels belonging to the kidney inside a drawn contour (e.g., see Fig. 1). This should be done for all axial slices that contain the kidney of interest, as indicated by the bounding box and the "pins" that are overlayed on many of the slices.
You'll notice that a small margin of "dark" voxels is left between the contour and the kidney. This is perfectly okay, and actually preferred. We will remove these voxels using a threshold operation later on.
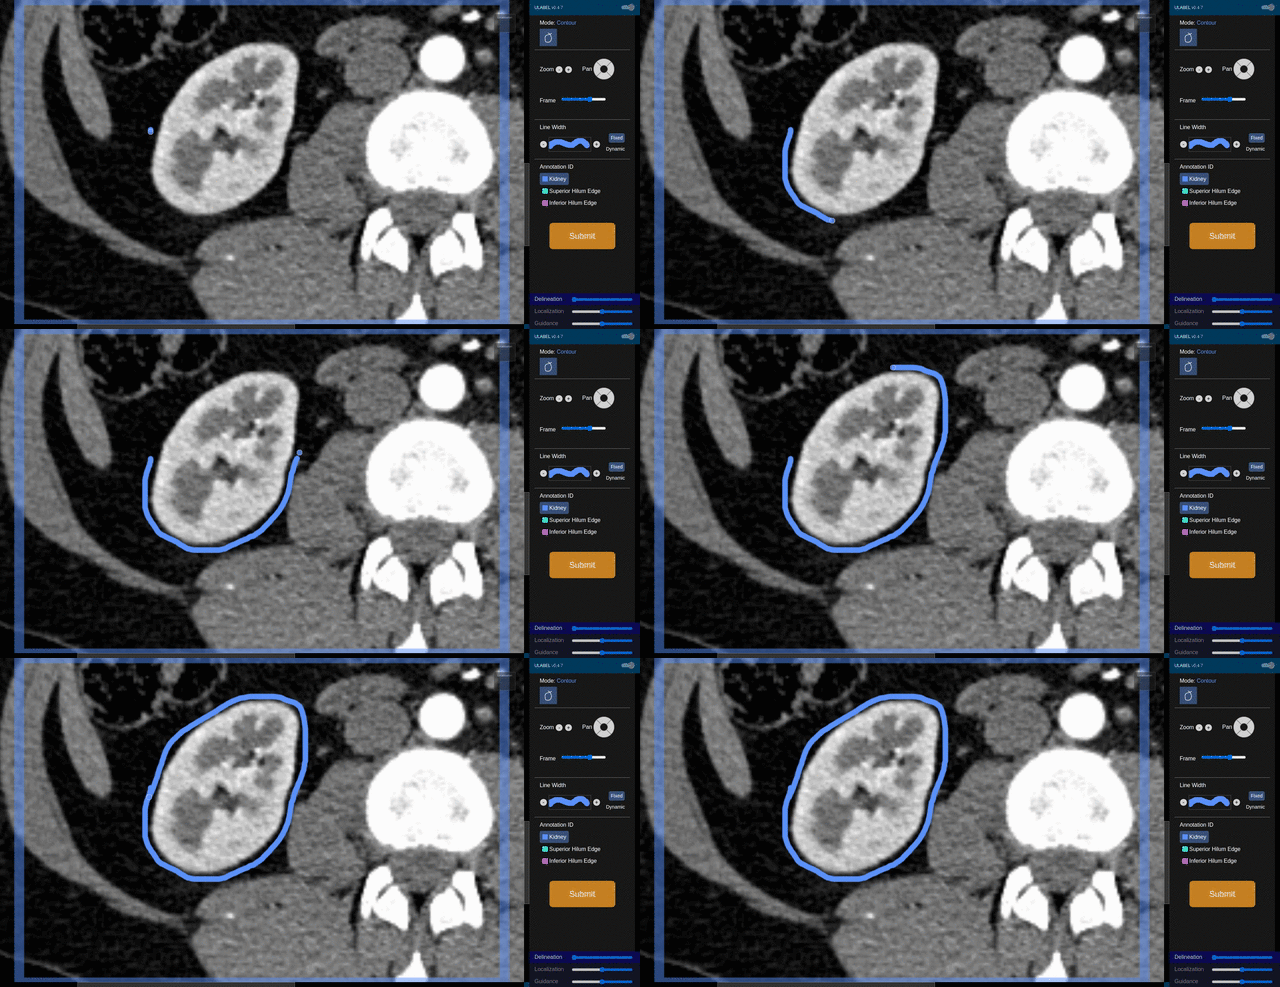
Fig. 1: An example of a valid contour for the kidney region on this slice.
Certain slices depict what's called a "renal hilum." This is where the blood vessels and ureter attaches to the organ. The boundaries between these vessels and the inter-hilar kidney need-not be annotated carefully. There is a postprocessing step that will identify this hilar region and handle it accordingly.
Fig. 2 shows an appropriate annotation for a slice containing the renal hilum. You must create a "dip" to make the hilum easily recognizable for the algorithm, but once again, the boundaries inside of this region are not important.
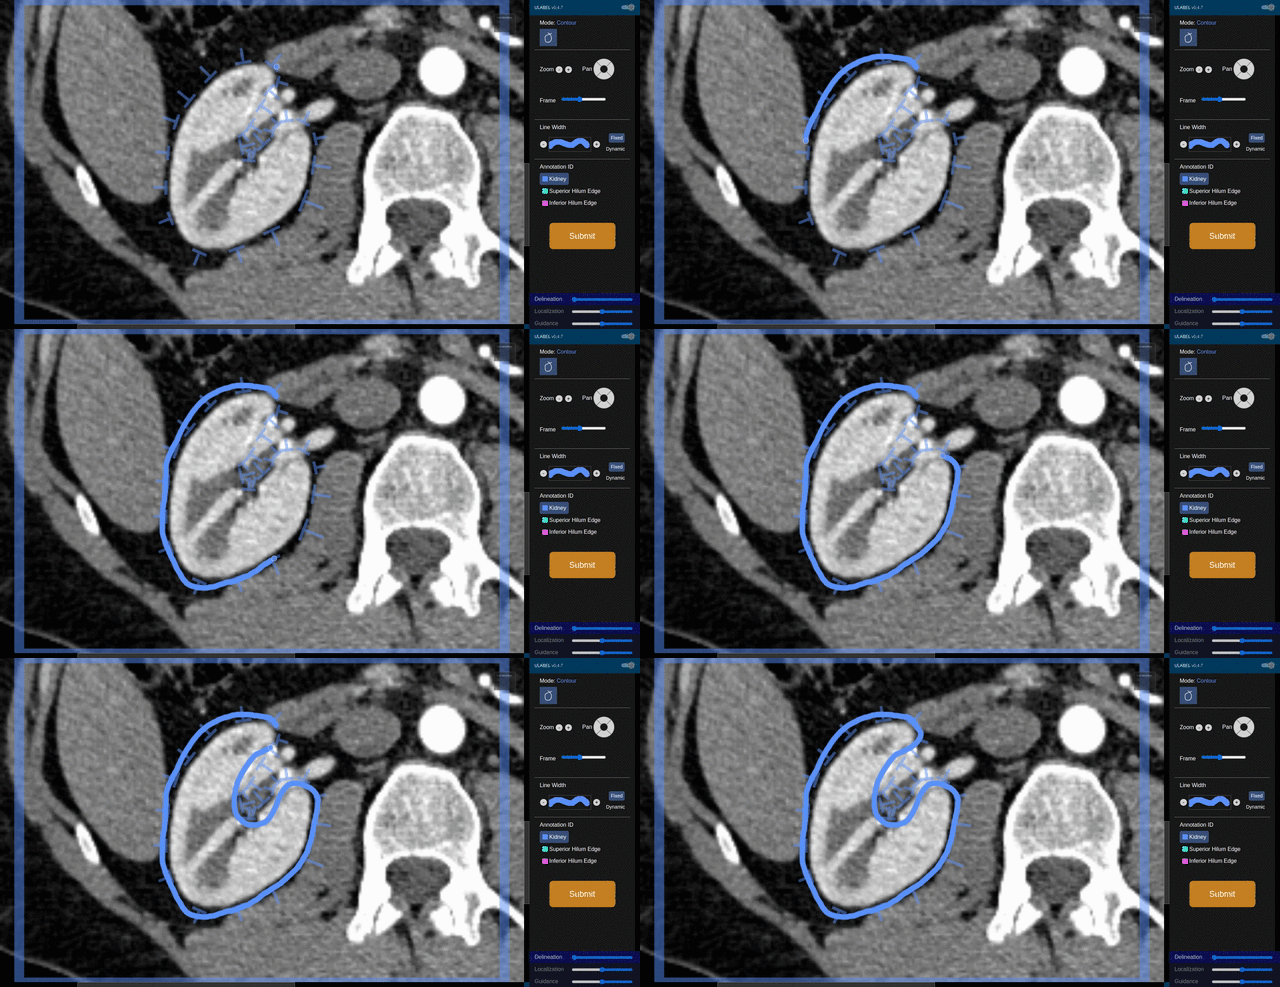
Fig. 2: An example of a valid contour for the kidney region on a slice that shows a hilum.
Other slices will show cysts and tumors on the kidneys. You should delineate these as a part of the kidney region, as shown in Fig. 3.
Notice how in Fig. 3 the delineation is made using more than one stroke. This is perfectly okay as long as the result is a closed shape.
Finally, remember to save! You may save as often as you like by hiting the "Submit" button. We recommend that you do this once per axial slice
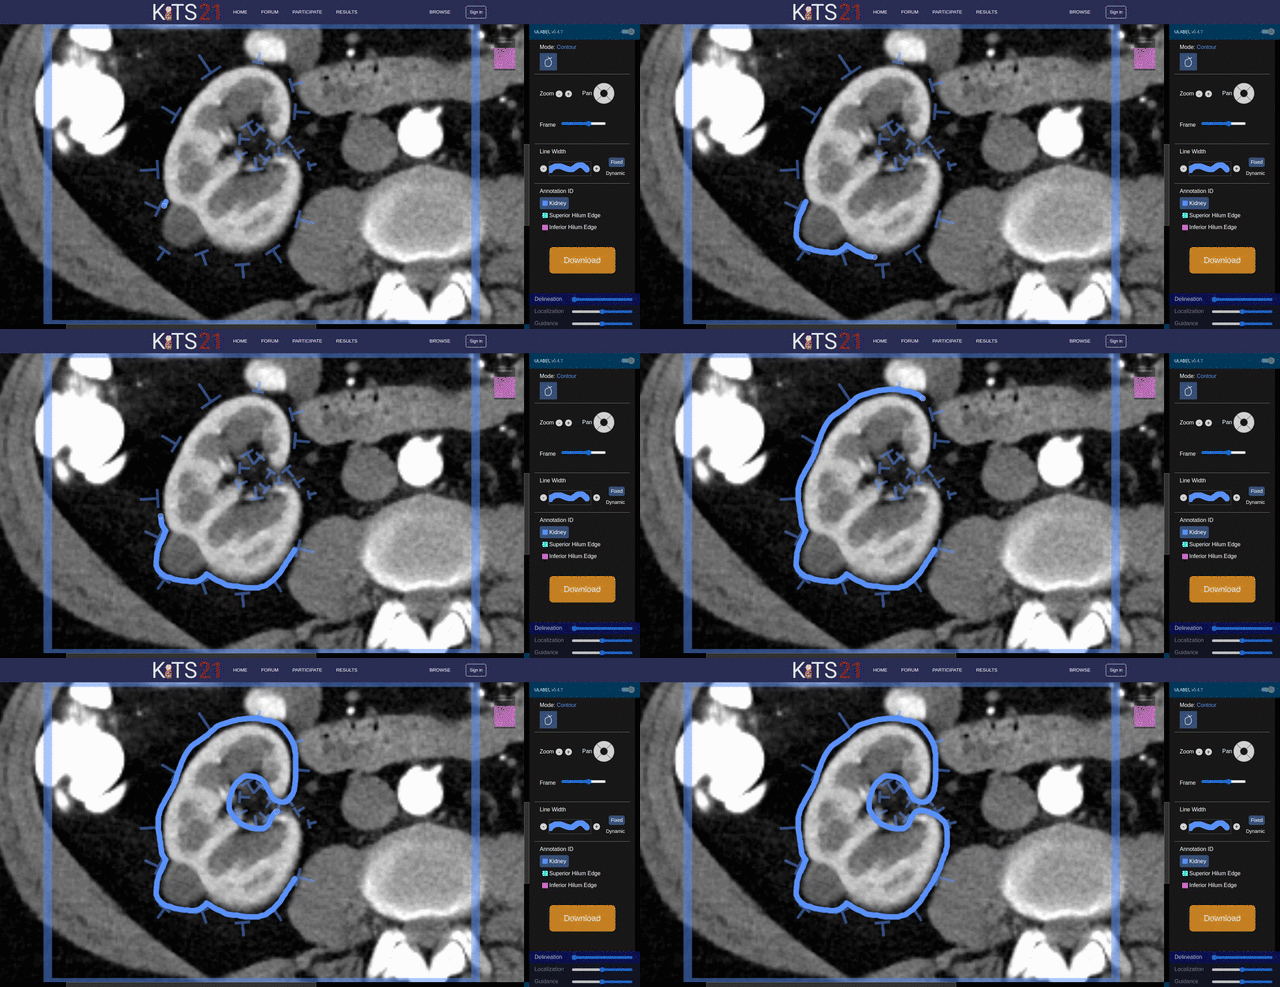
Fig. 3: An example of a valid contour for the kidney region on a slice that shows a tumor and a hilum.
The task is to enclose all voxels belonging to the ureter inside a drawn contour (e.g., see Fig. 4). This should be done for all axial slices that contain the ureter of interest, as indicated by the bounding box and the "pins" that are overlayed on many of the slices.
You'll notice that a small margin of "dark" voxels is left between the contour and the ureter. This is perfectly okay, and actually preferred. We will remove these voxels using a threshold operation later on.
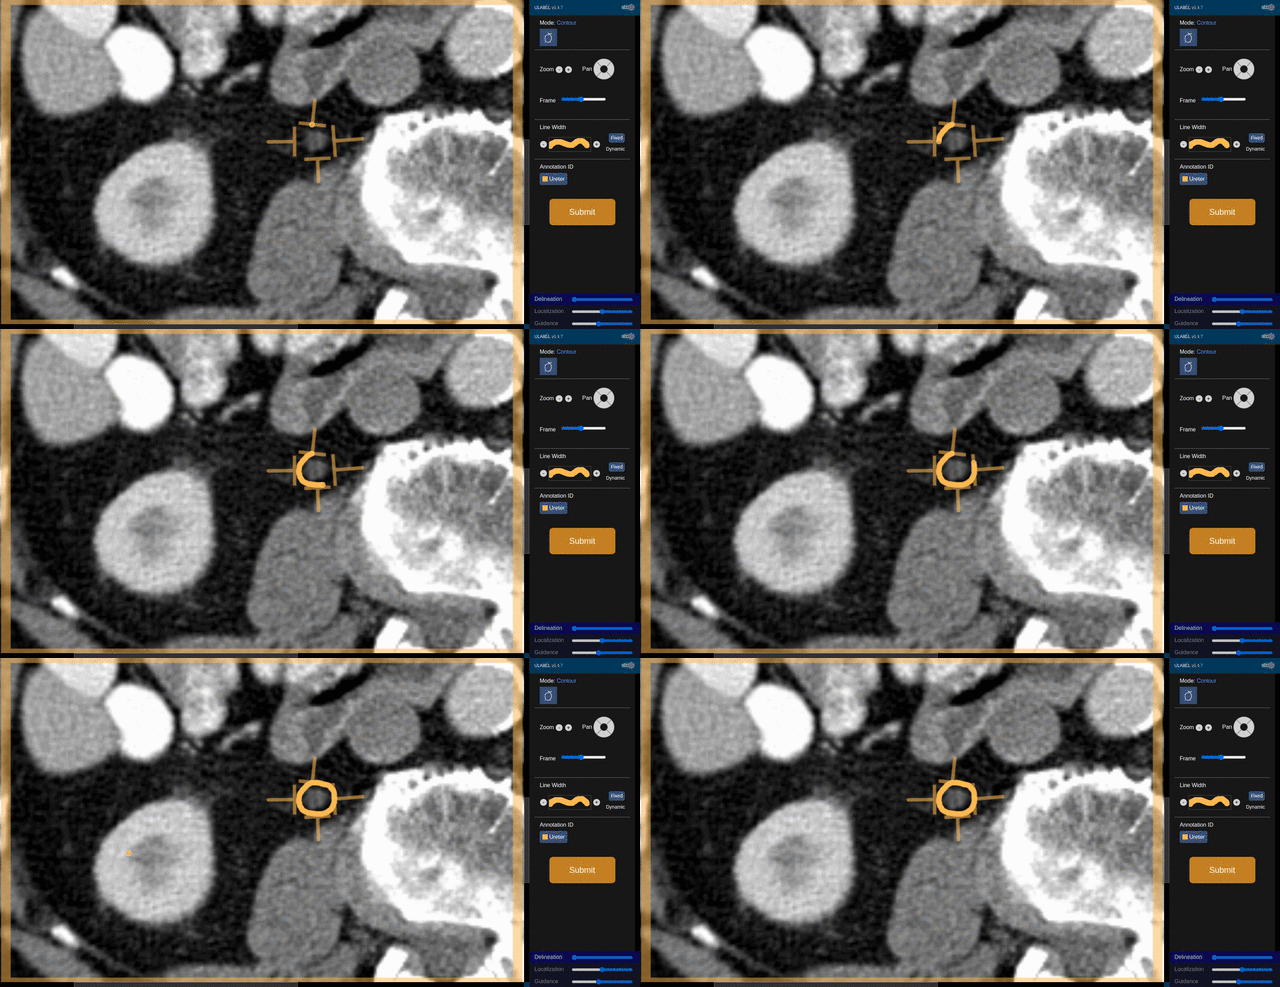
Fig. 4: An example of a valid contour for the ureter region on this slice.
Certain slices will show multiple fragments of the ureter. In cases where these are well-separated from each other, they should be annotated with independent contours (see Fig. 5).
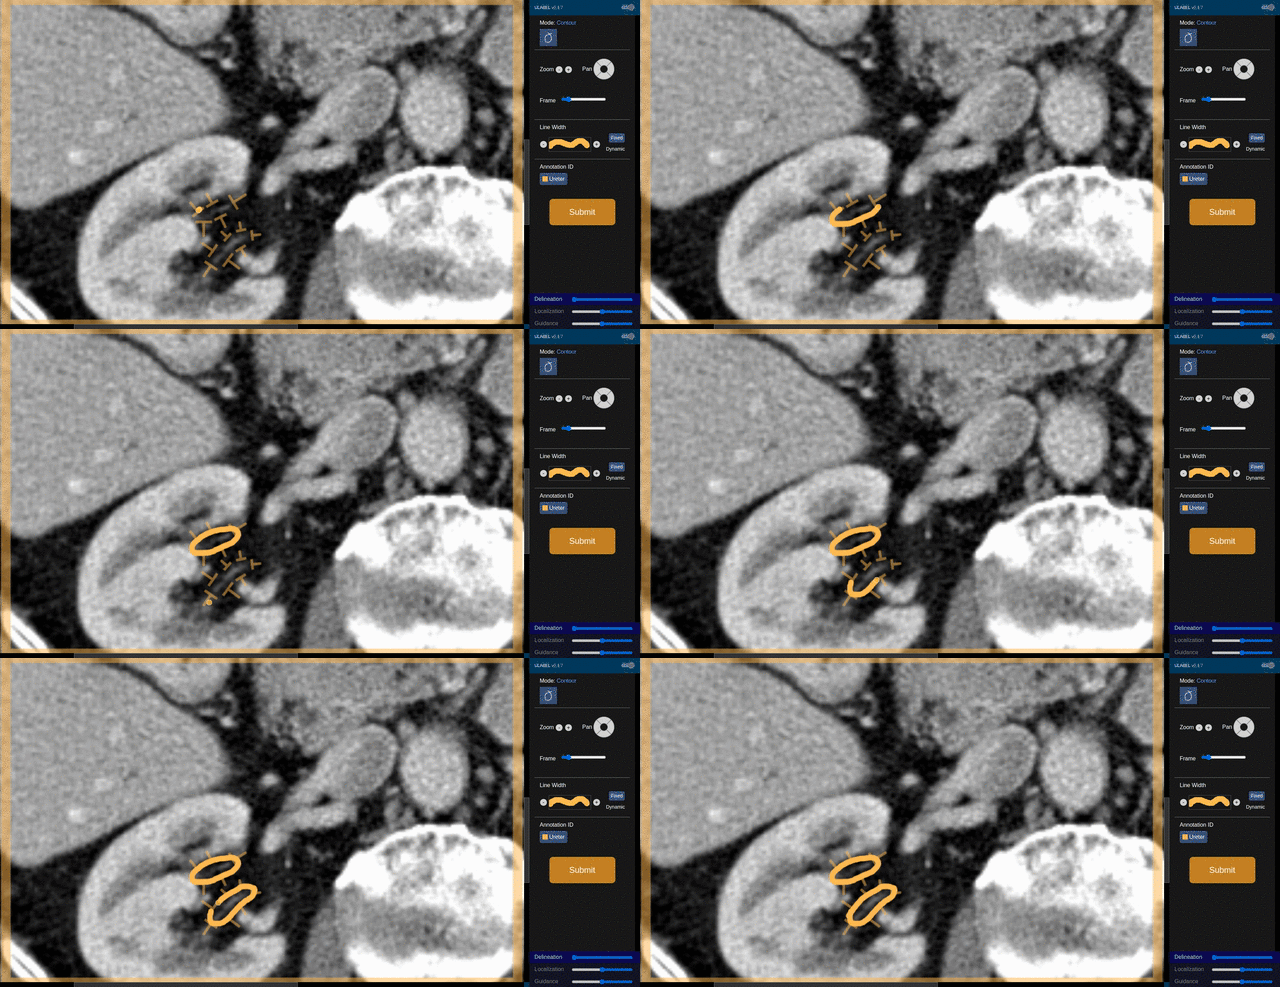
Fig. 5: An example of a valid contour for the ureter region on a slice that shows two fragements of a ureter that are well-separated.
Other slices will show two ureter fragments that are sufficiently close with nothing else "bright" in between them. These can be annotated using a single contour (e.g., see Fig. 6).
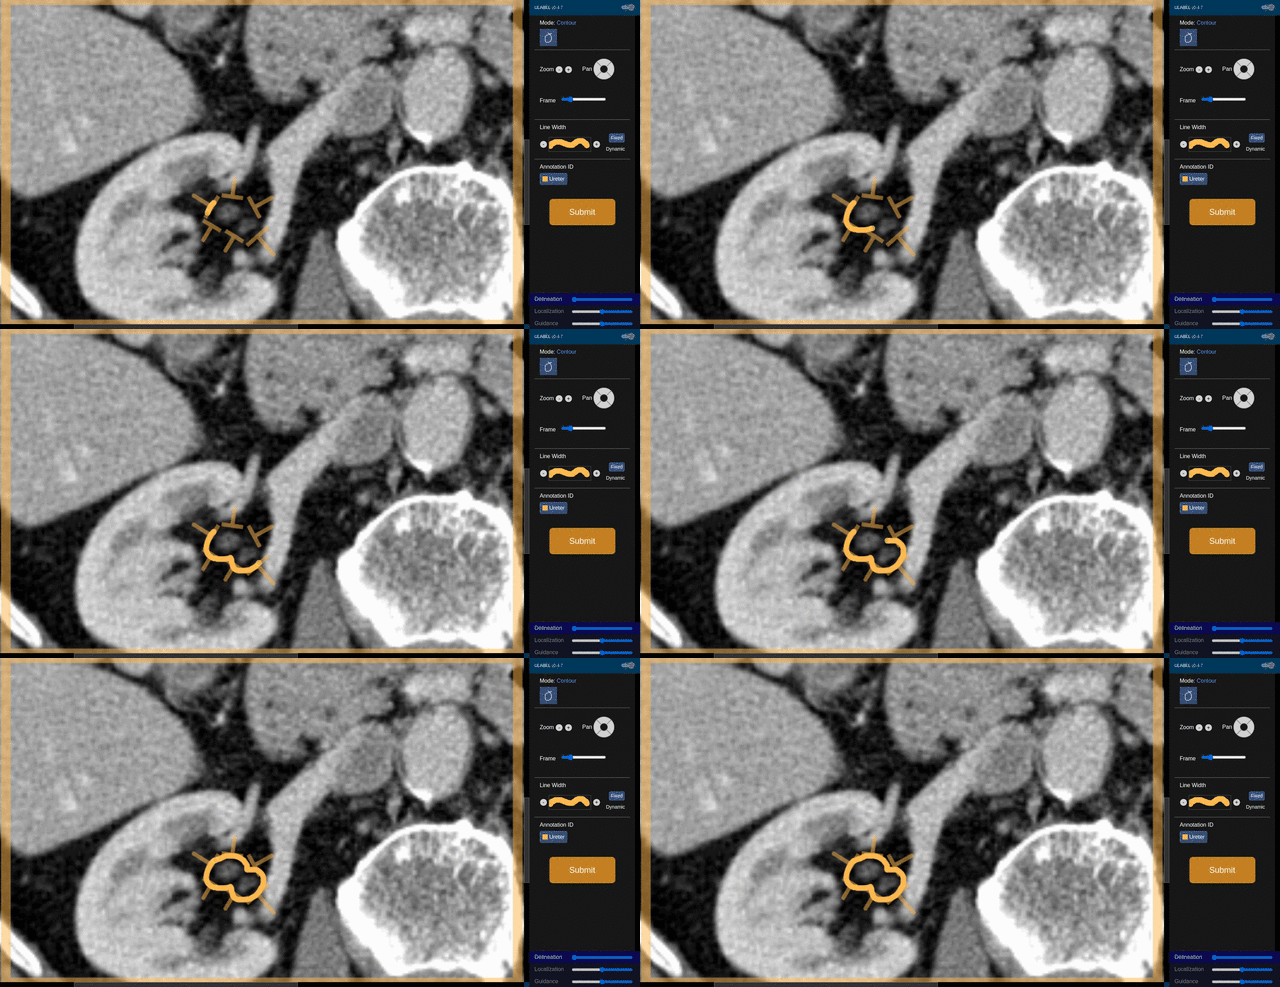
Fig. 6: An example of a valid contour for ureter on a slice that shows to fragments that are near each other and not separated by something bright.
The task is to enclose all voxels belonging to either the descending aorta or the renal arteries inside a drawn contour (e.g., see Fig. 7). This should be done for all axial slices that contain these structures, as indicated by the bounding box and the "pins" that are overlayed on many of the slices.
You'll notice that a small margin of "dark" voxels is left between the contour and the arteries. This is perfectly okay, and actually preferred. We will remove these voxels using a threshold operation later on.
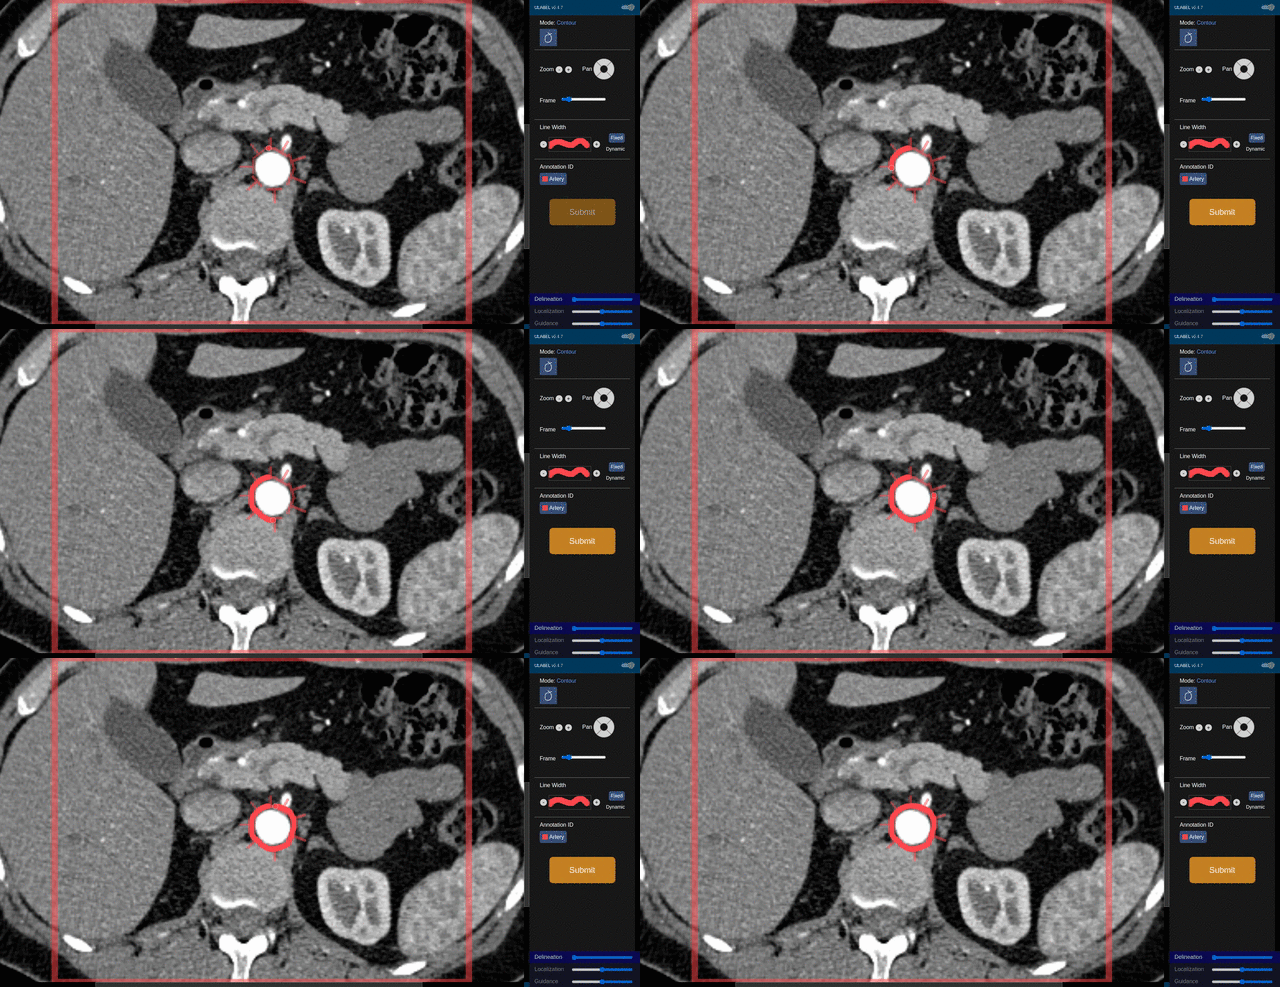
Fig. 7: An example of a valid contour for the artery region on this slice.
The renal arteries can branch and appear as several different fragments within an axial slice. It's important that you make sure to draw a contour for each and every fragment in the image. You may find it helpful to zoom and pan (as shown in Fig. 8) using the keyboard and mouse shortcuts at the top of this page.
Note also that not necessarily every axial slice will have guidance pins. In this case, you will need to follow the regions of interest between frames that are guided.
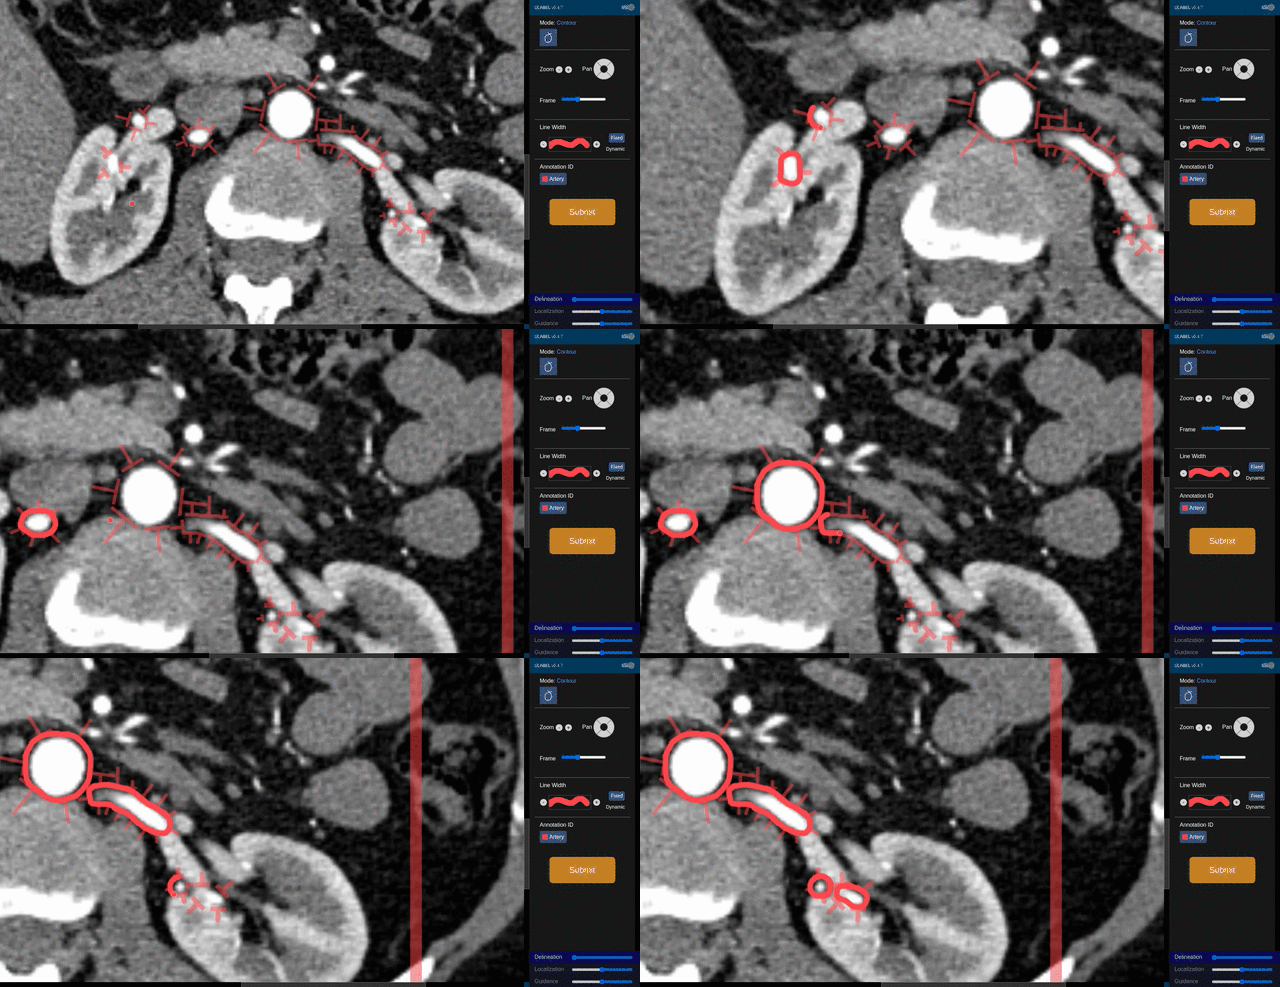
Fig. 8: An example of a valid set of contours for the artery region on a slice that shows the intrahilar region of both kidneys.
The task is to enclose all voxels belonging to either the inferior vena cava or the renal veins inside a drawn contour (e.g., see Fig. 9). This should be done for all axial slices that contain these structures, as indicated by the bounding box and the "pins" that are overlayed on many of the slices.
You'll notice that a small margin of "dark" voxels is left between the contour and the veins. This is perfectly okay, and actually preferred. We will remove these voxels using a threshold operation later on.
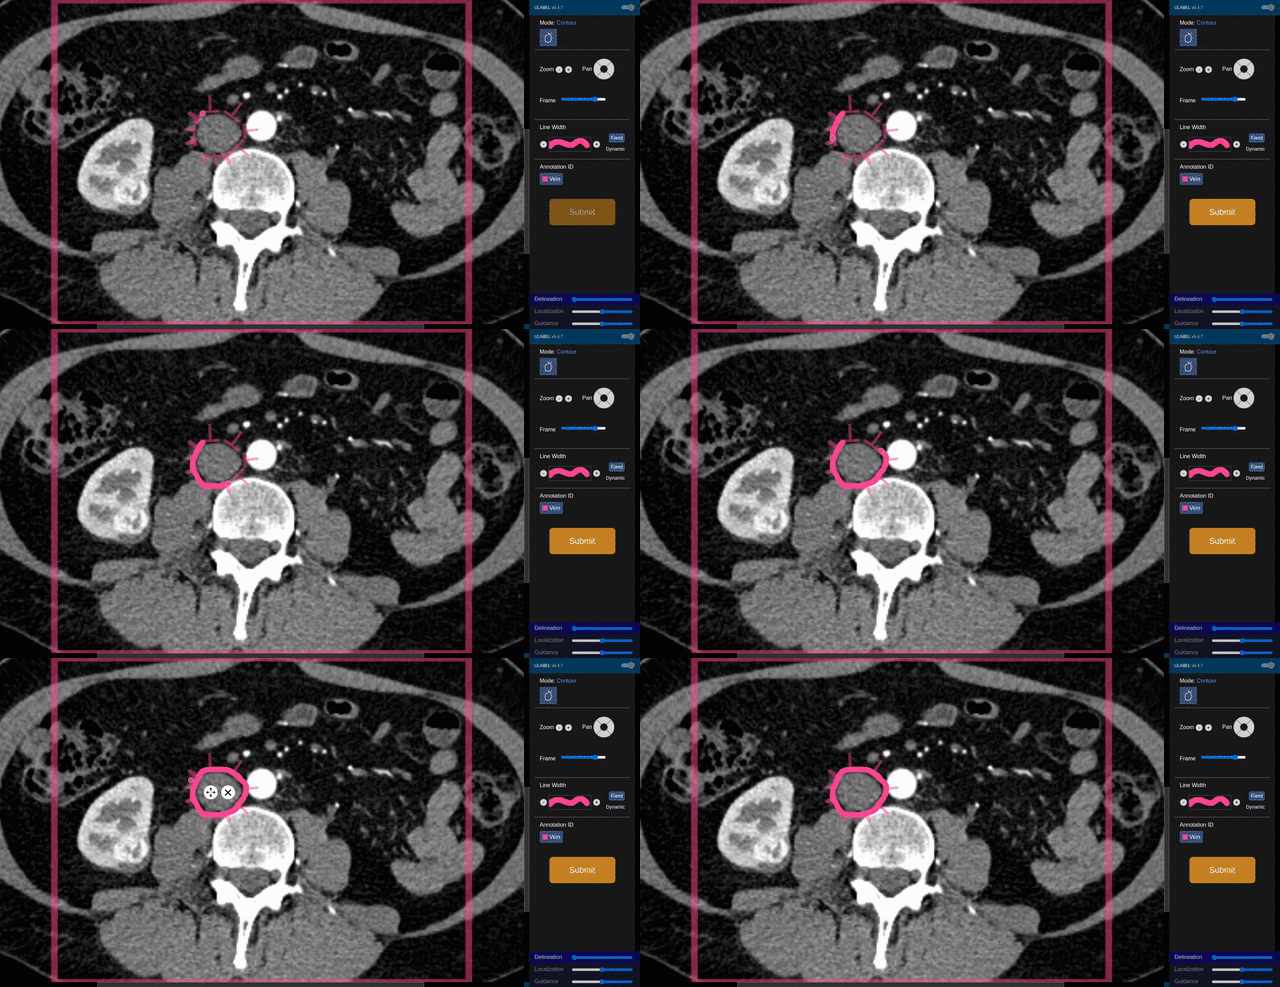
Fig. 9: An example of a valid contour for the vein region on this slice.
The renal veins can branch and appear as several different fragments within an axial slice. It's important that you make sure to draw a contour for each and every fragment in the image. You may find it helpful to zoom and pan (as shown in Fig. 10) using the keyboard and mouse shortcuts at the top of this page.
Note also that not necessarily every axial slice will have guidance pins. In this case, you will need to follow the regions of interest between frames that are guided.
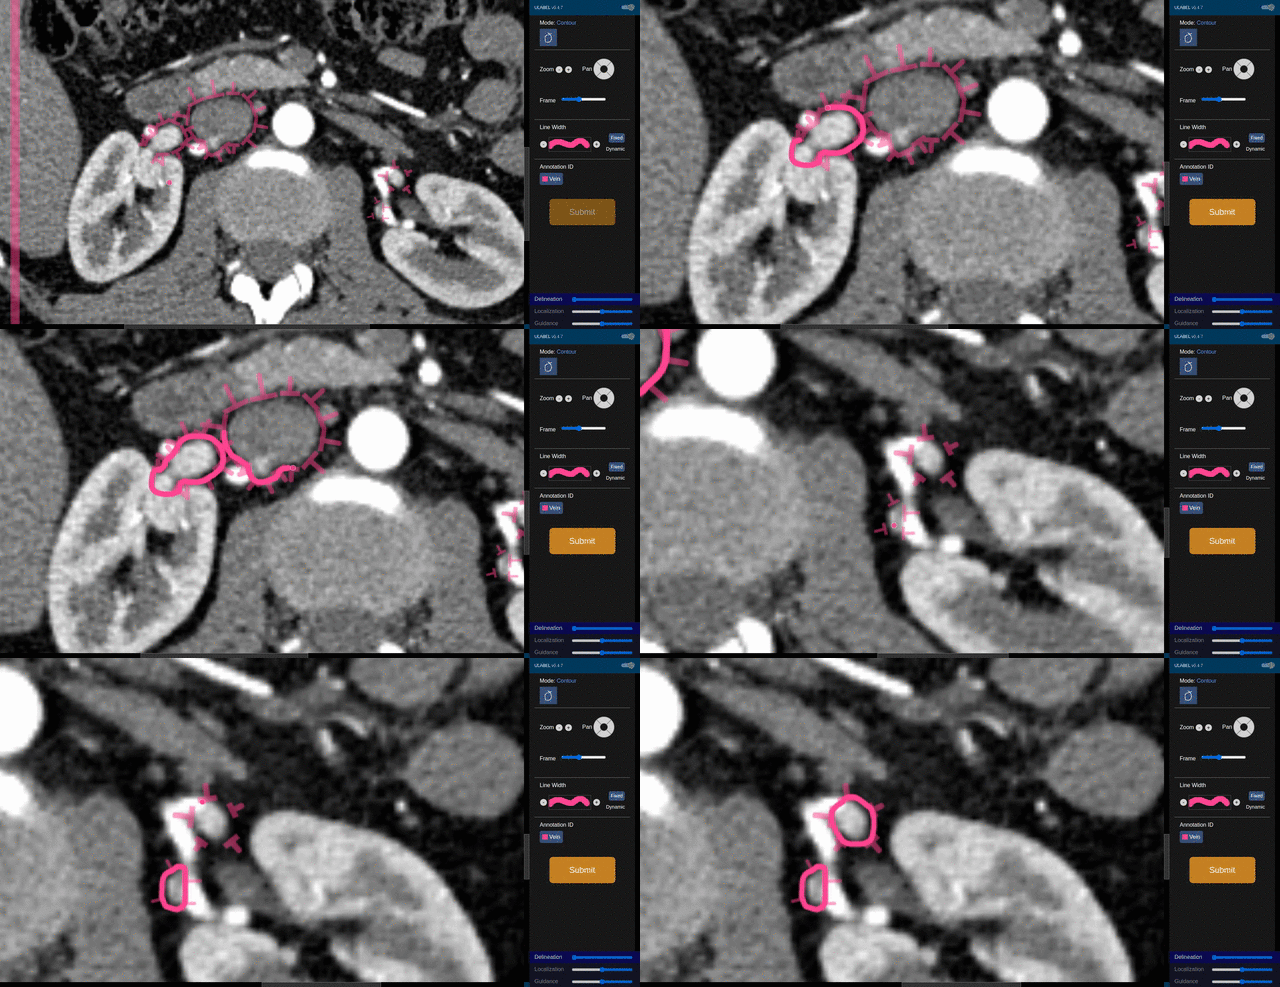
Fig. 10: An example of a valid set of contours for the vein region on a slice that shows the intrahilar region of both kidneys.
The task is to enclose all voxels belonging to a cyst inside a drawn contour (e.g., see Fig. 11). This should be done for all axial slices that contain the cyst of interest, as indicated by the bounding box and the "pins" that are overlayed on many of the slices.
You'll notice that a small margin of "dark" voxels is sometimes left between the contour and the cyst on its border with the surrounding fat. This is perfectly okay, and actually preferred. We will remove these voxels using a threshold operation later on. The border with the kidney must be precisely defined, however.
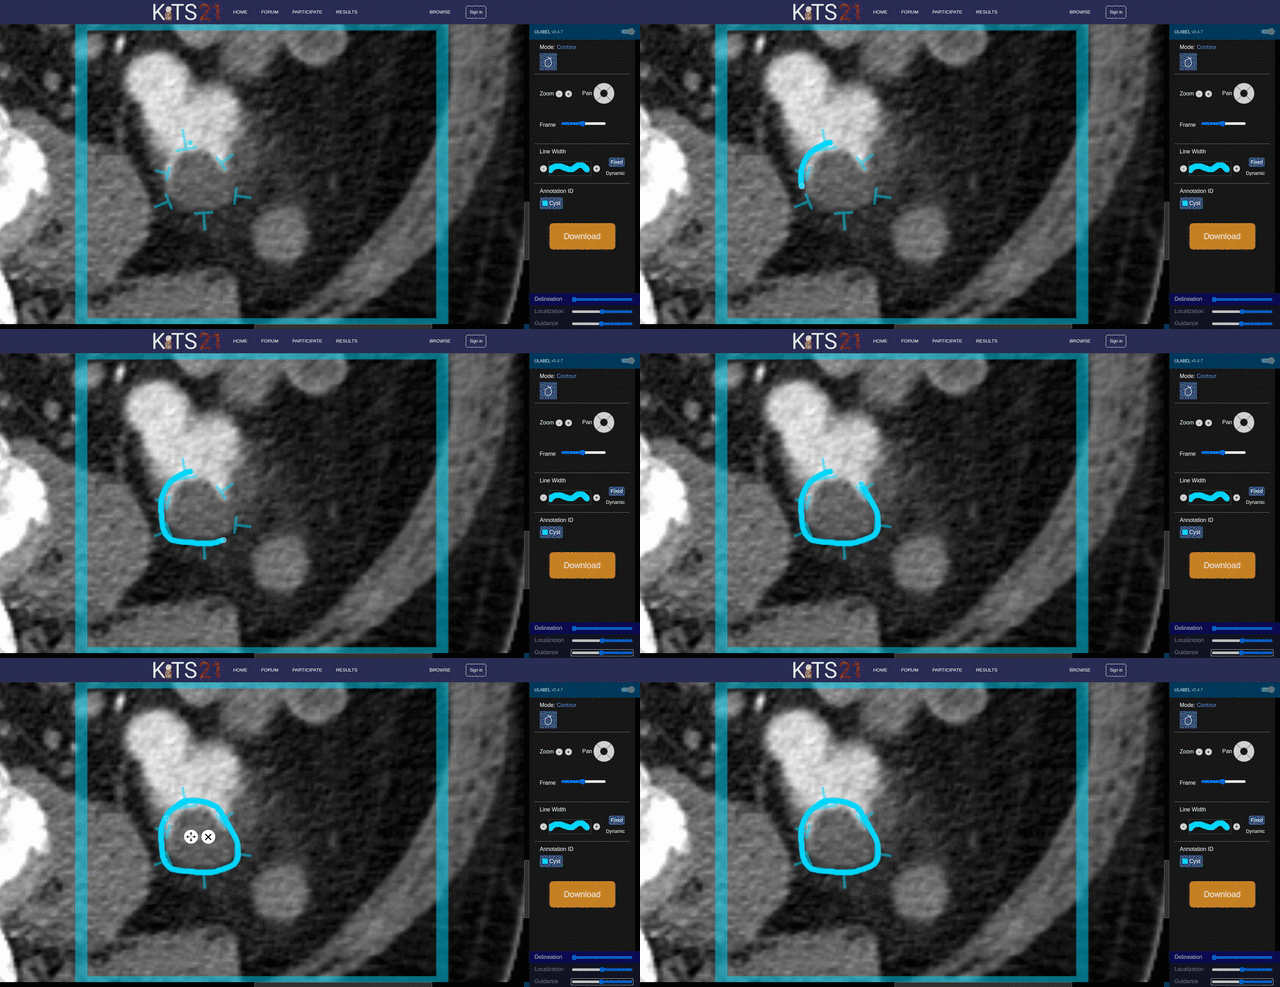
Fig. 11: An example of a valid contour for the cyst region on this slice.
Not every slice that includes a cyst will necessarily have guidance pins to show you where it is. In this case, it's helpful to flip back-and-forth between an unguided slice and the guided slices around it (e.g., in Fig. 12) to make sure you are annotating the correct structure. Remember that the scroll wheel can be used to toggle between slices.
Often cysts will border other "bright" structures such as the liver (see Fig. 12). You must be careful when delineating this boundary as well because no threshold can be used to remove any liver voxels that are erroneously included.
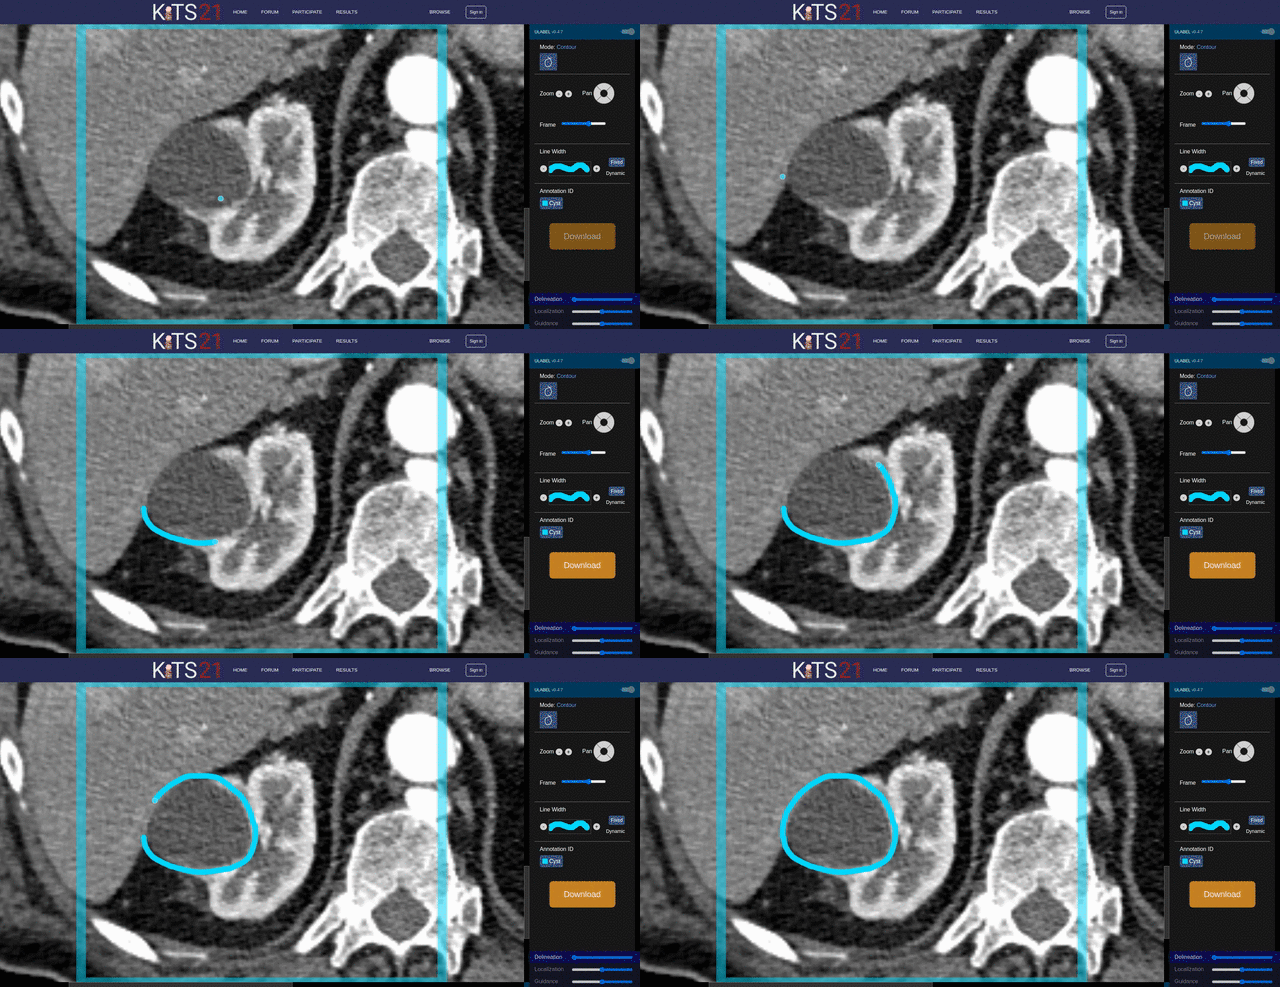
Fig. 12: An example of a slice that does not have guidance pins, so you need to look at the slices before and after to infer the region of interest.
The task is to enclose all voxels belonging to a tumor inside a drawn contour (e.g., see Fig. 13). This should be done for all axial slices that contain the tumor of interest, as indicated by the bounding box and the "pins" that are overlayed on many of the slices.
You'll notice that a small margin of "dark" voxels is sometimes left between the contour and the tumor on its border with the surrounding fat. This is perfectly okay, and actually preferred. We will remove these voxels using a threshold operation later on. However, the border between the tumor and the kidney cannot be refined with a threshold and must be defined precisely.
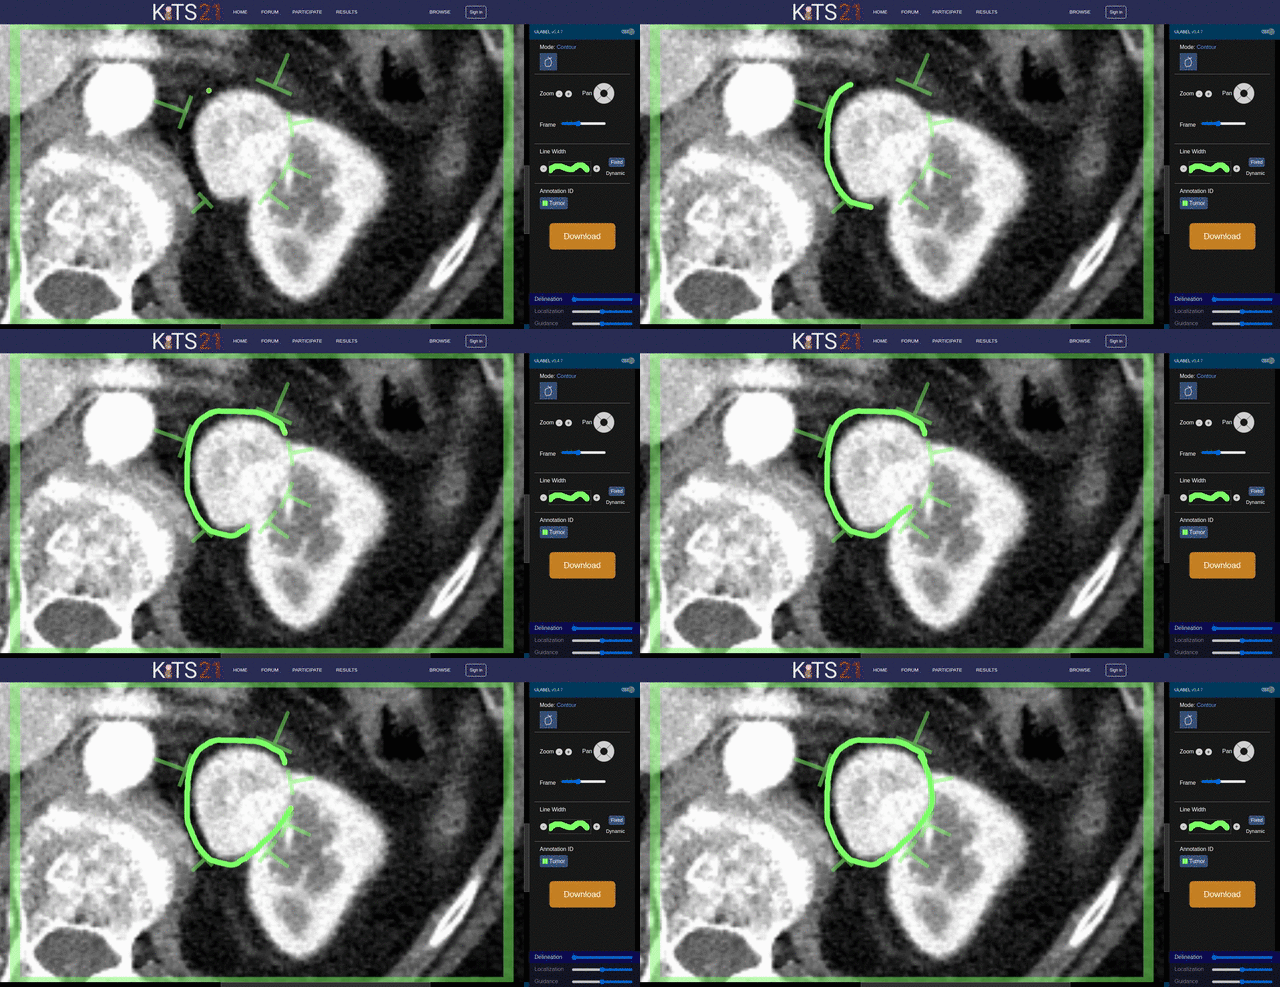
Fig. 13: An example of a valid contour for the tumor region on this slice.
Note that the boundaries for certain tumors can be very difficult to identify. In these cases, the guidance pins are intentionally vague. Do your best to identify where the most natural border lies. It's often helpful to use the "Guidance" slider in the bottom right to temporarily hide the guidance pins.
Note that all voxels that have been "colored" by your contour will be excluded from the final region. You can therefore go back and widen your stroke in a case where you make have included more than you intended (e.g., see Fig. 14).
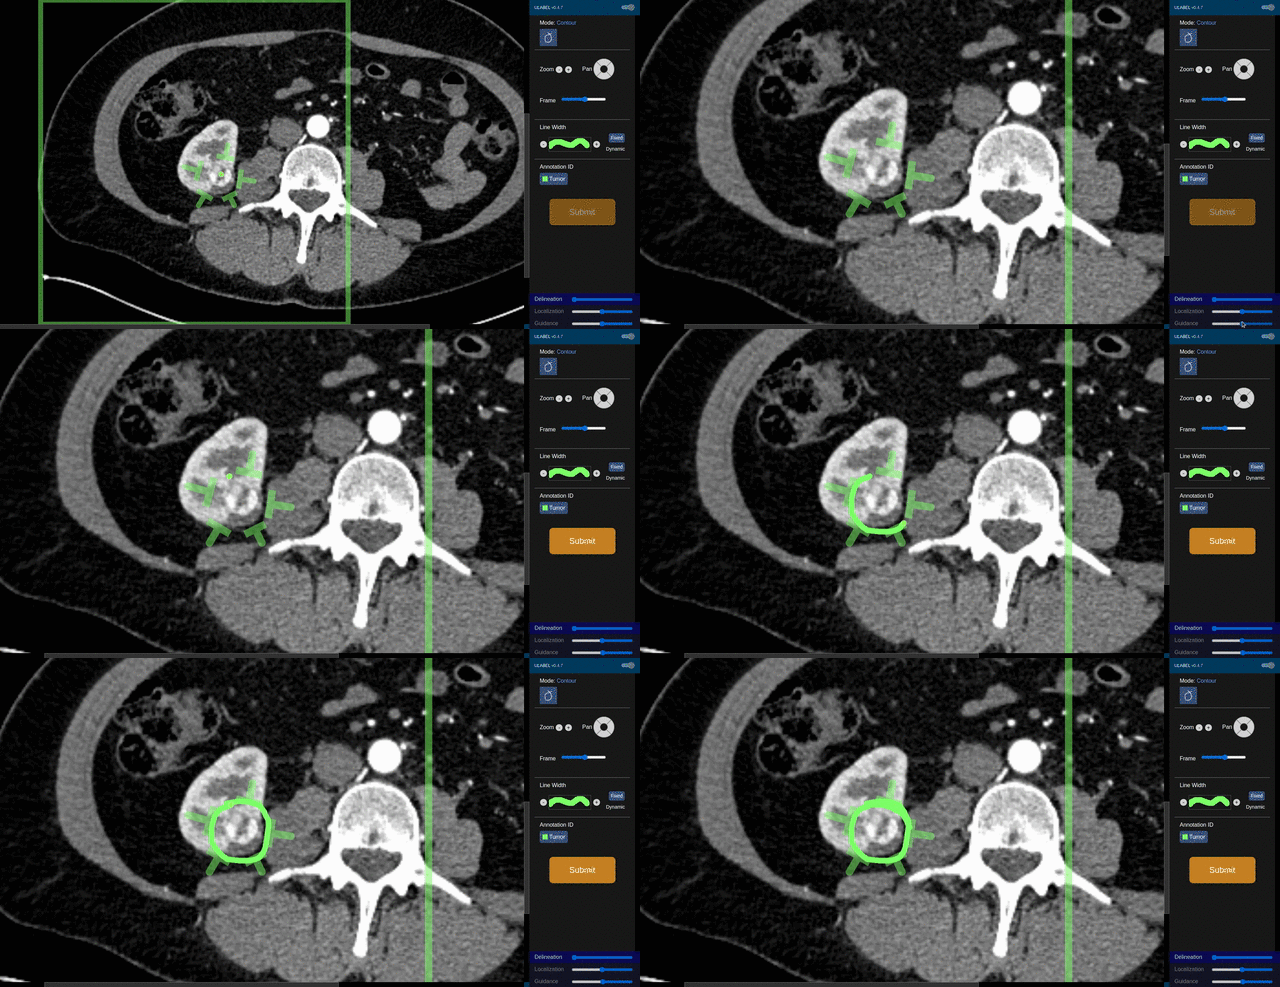
Fig. 14: An example of a tumor with poorly-defined boundaries. You must do your best to infer the natural border here.